Try this delicious Pierogi Casserole recipe with layers of onion pierogis, ricotta cheese, kielbasa, and cheddar cheese – perfect for a cozy family dinner.

Easy Pierogi Casserole Recipe
Life can be hectic, and sometimes you need an easy casserole recipe to get you through those busy weeknights.
That’s where this delicious pierogi casserole comes in!
With simple ingredients that are easy to find in the freezer aisle, this dish is a great way to feed your family without spending hours in the kitchen.
And a great recipe for a make-ahead meal and can also be frozen and ready for a quick easy dinner the whole family will actually eat.
What is a pierogi?
Pierogies are dumplings filled with mashed potatoes and sweet or savory ingredients. Its origins are rooted in European cuisine.
Fun fact: Pierogi is the national dish of Poland and dates back to the 13th century. They are usually cooked in boiling water and then often pan-fried before serving.
Traditional Polish pierogis might be served with a dollop of sour cream, cottage cheese, Greek yogurt, or melted butter with fried onions.
Looking for another unique casserole? Check out my Amish shipwreck casserole with tomato soup.
This post may contain affiliate links. As an Amazon Associate, I earn from qualifying purchases. Read my disclosure policy here.

Ingredients Needed
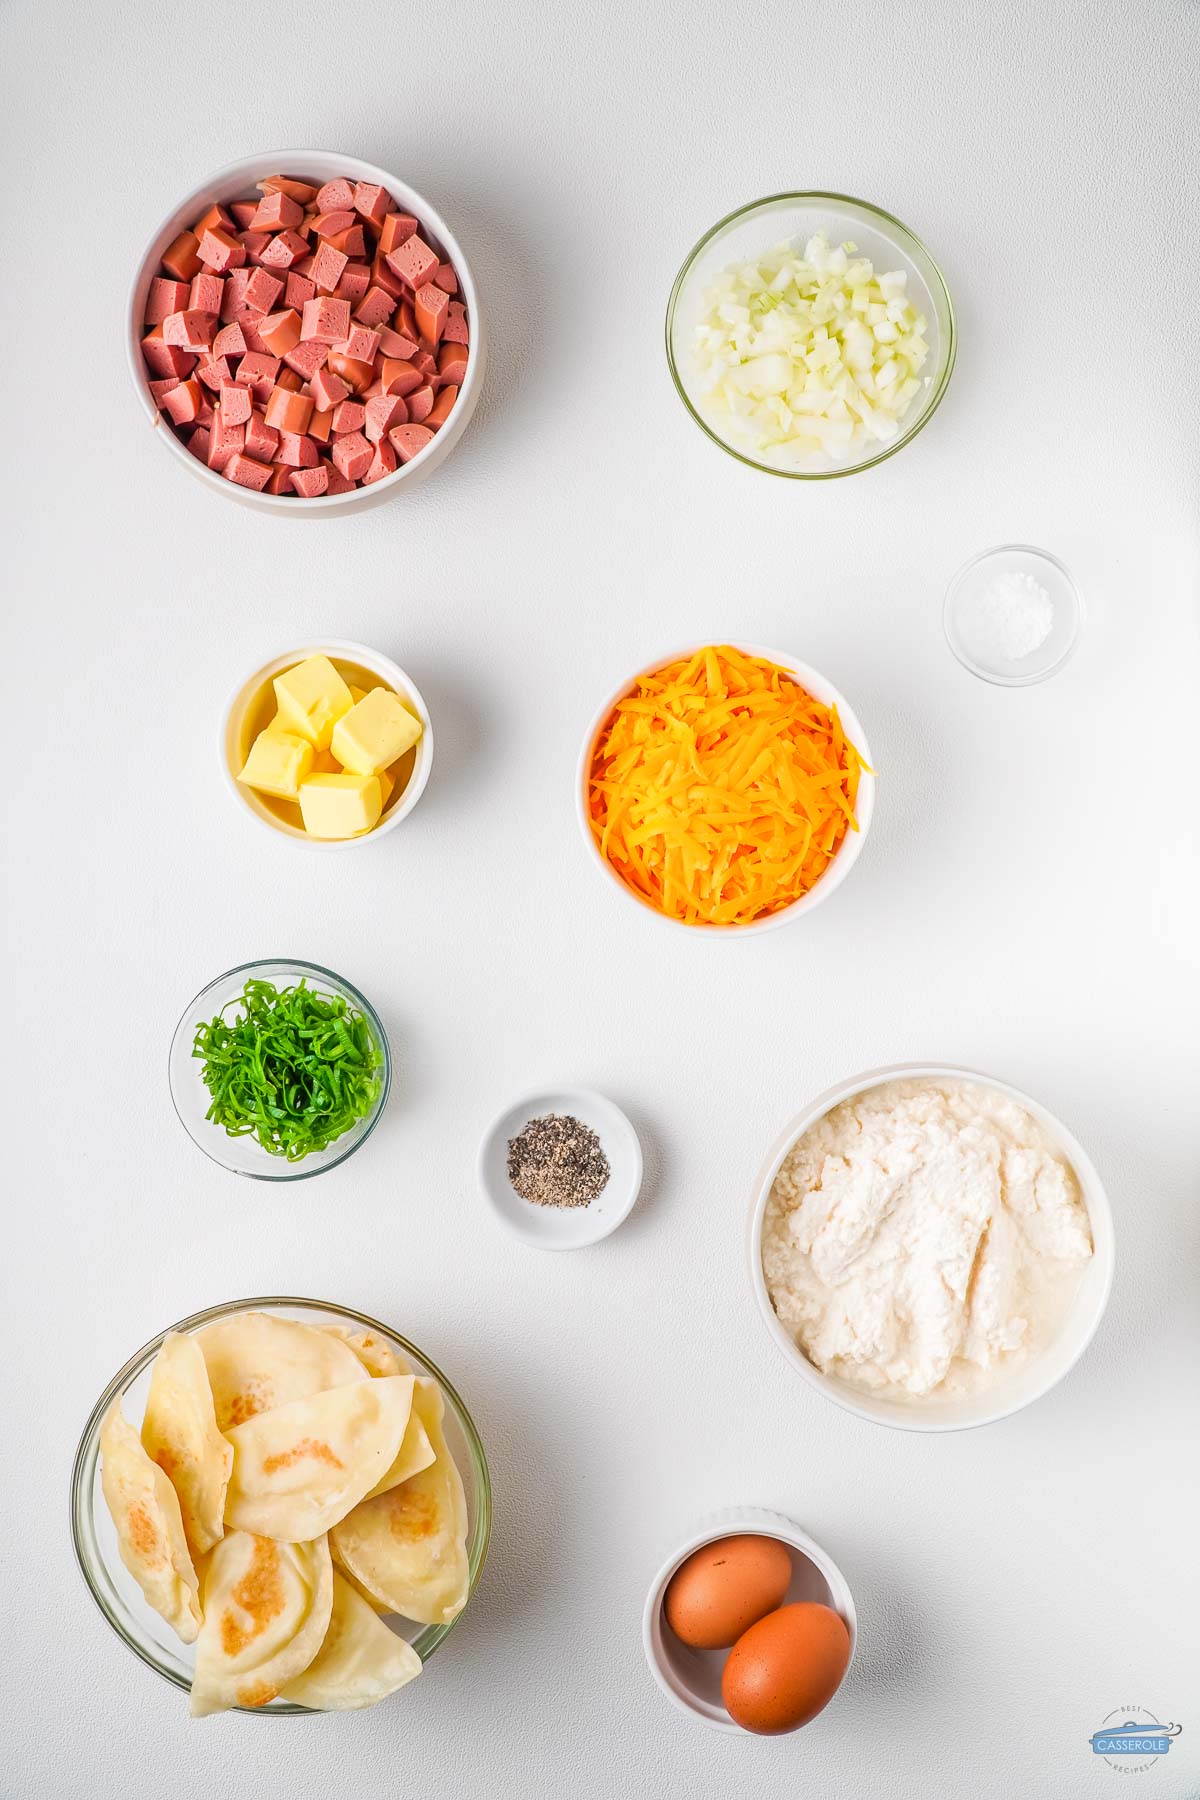
- Cheese Pierogis – I use frozen pierogi found in the frozen aisle of your supermarket. You can also use fresh or homemade pierogi.
- Onion – White or yellow onion both work well in this recipe. One of my favorite shortcuts is buying chopped onions in the produce or frozen section of my grocery store. Saves me time and tears!
- Ricotta cheese – Cottage cheese can also be used. I recommend using 4% fat and blending it for a bit in your food processor so your cottage cheese mixture will have the same creaminess as ricotta.
- Cheddar cheese – You need shredded cheese for this casserole. You can buy pre-shredded cheese or grate your own.
- Kielbasa – I prefer this sausage, but you can experiment with different meats such as Italian sausage and ground pork sausage. It would also be a perfect way to use up leftover ham or shredded chicken.
- Green onions – You will garnish your casserole with these chopped onions. You could also use chives, or parsley if you don’t want additional onion flavor.
- Pantry staples – Unsalted butter, large eggs, salt, and black pepper.
Follow us on Pinterest so you can easily save your favorite casserole recipes to your dinner planning board. And save a few of our other recipes while you are there!

How to Make Pierogi Casserole
- Preheat the oven to 350°F and spray a 9×9 baking dish with nonstick cooking spray.
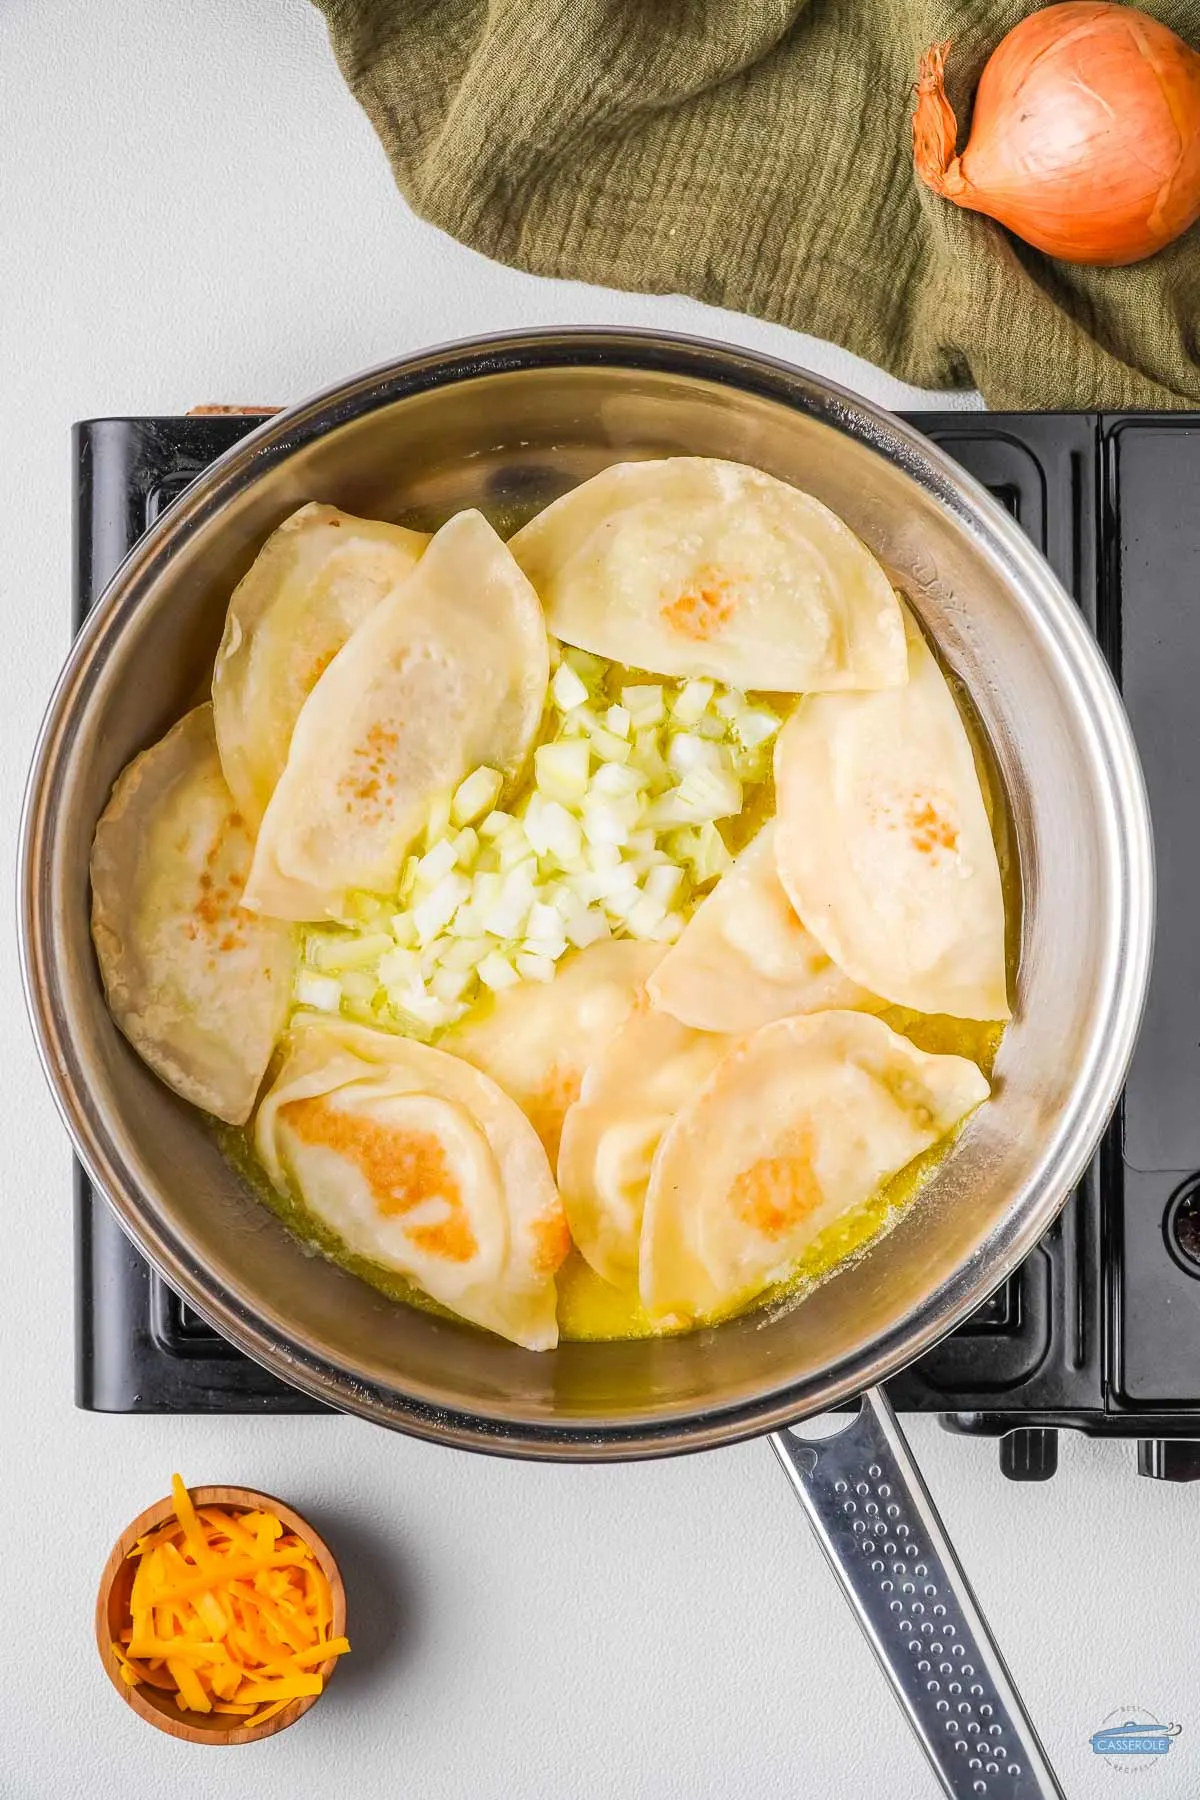
- In a large skillet over medium heat, melt butter and brown the frozen pierogies and diced onions in two batches. Set aside to cool slightly.
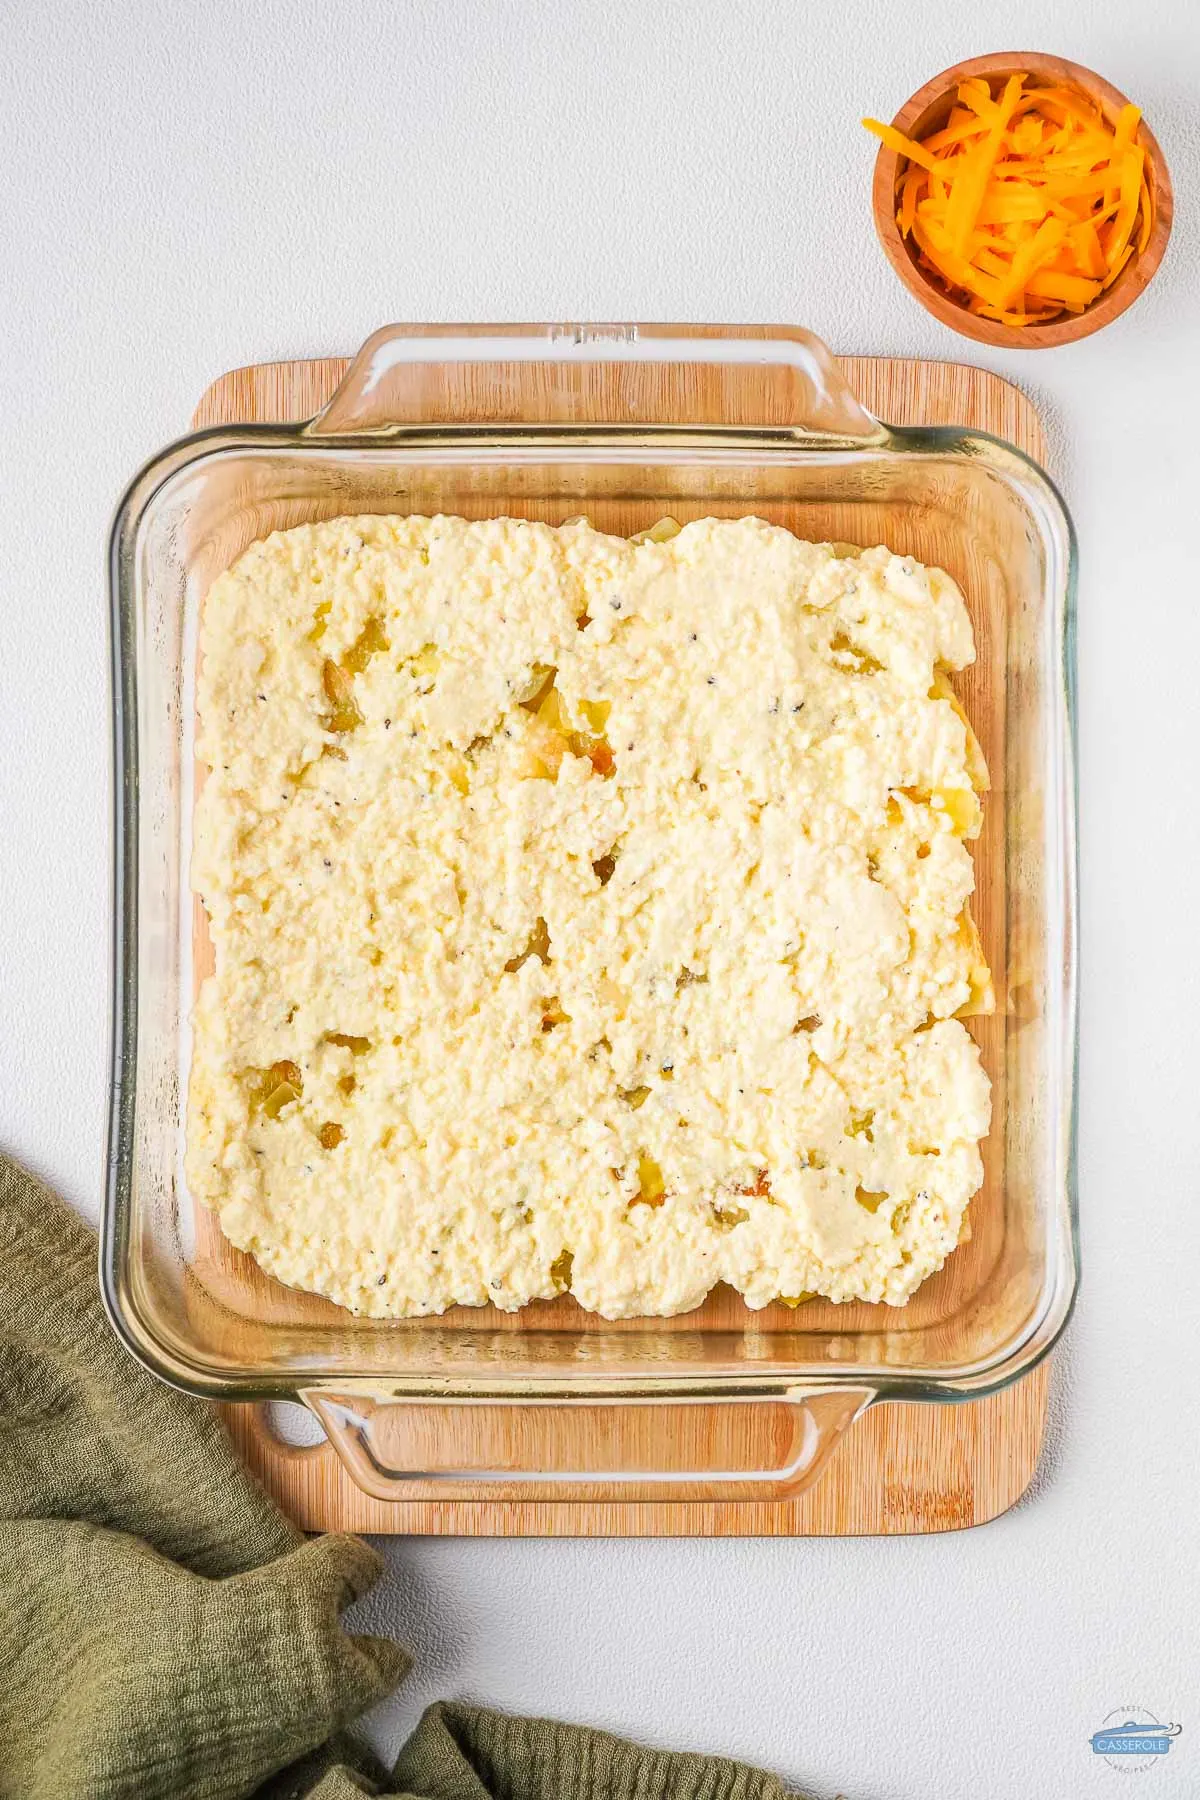
- In a mixing bowl, combine the ricotta cheese, beaten eggs, salt, and pepper.

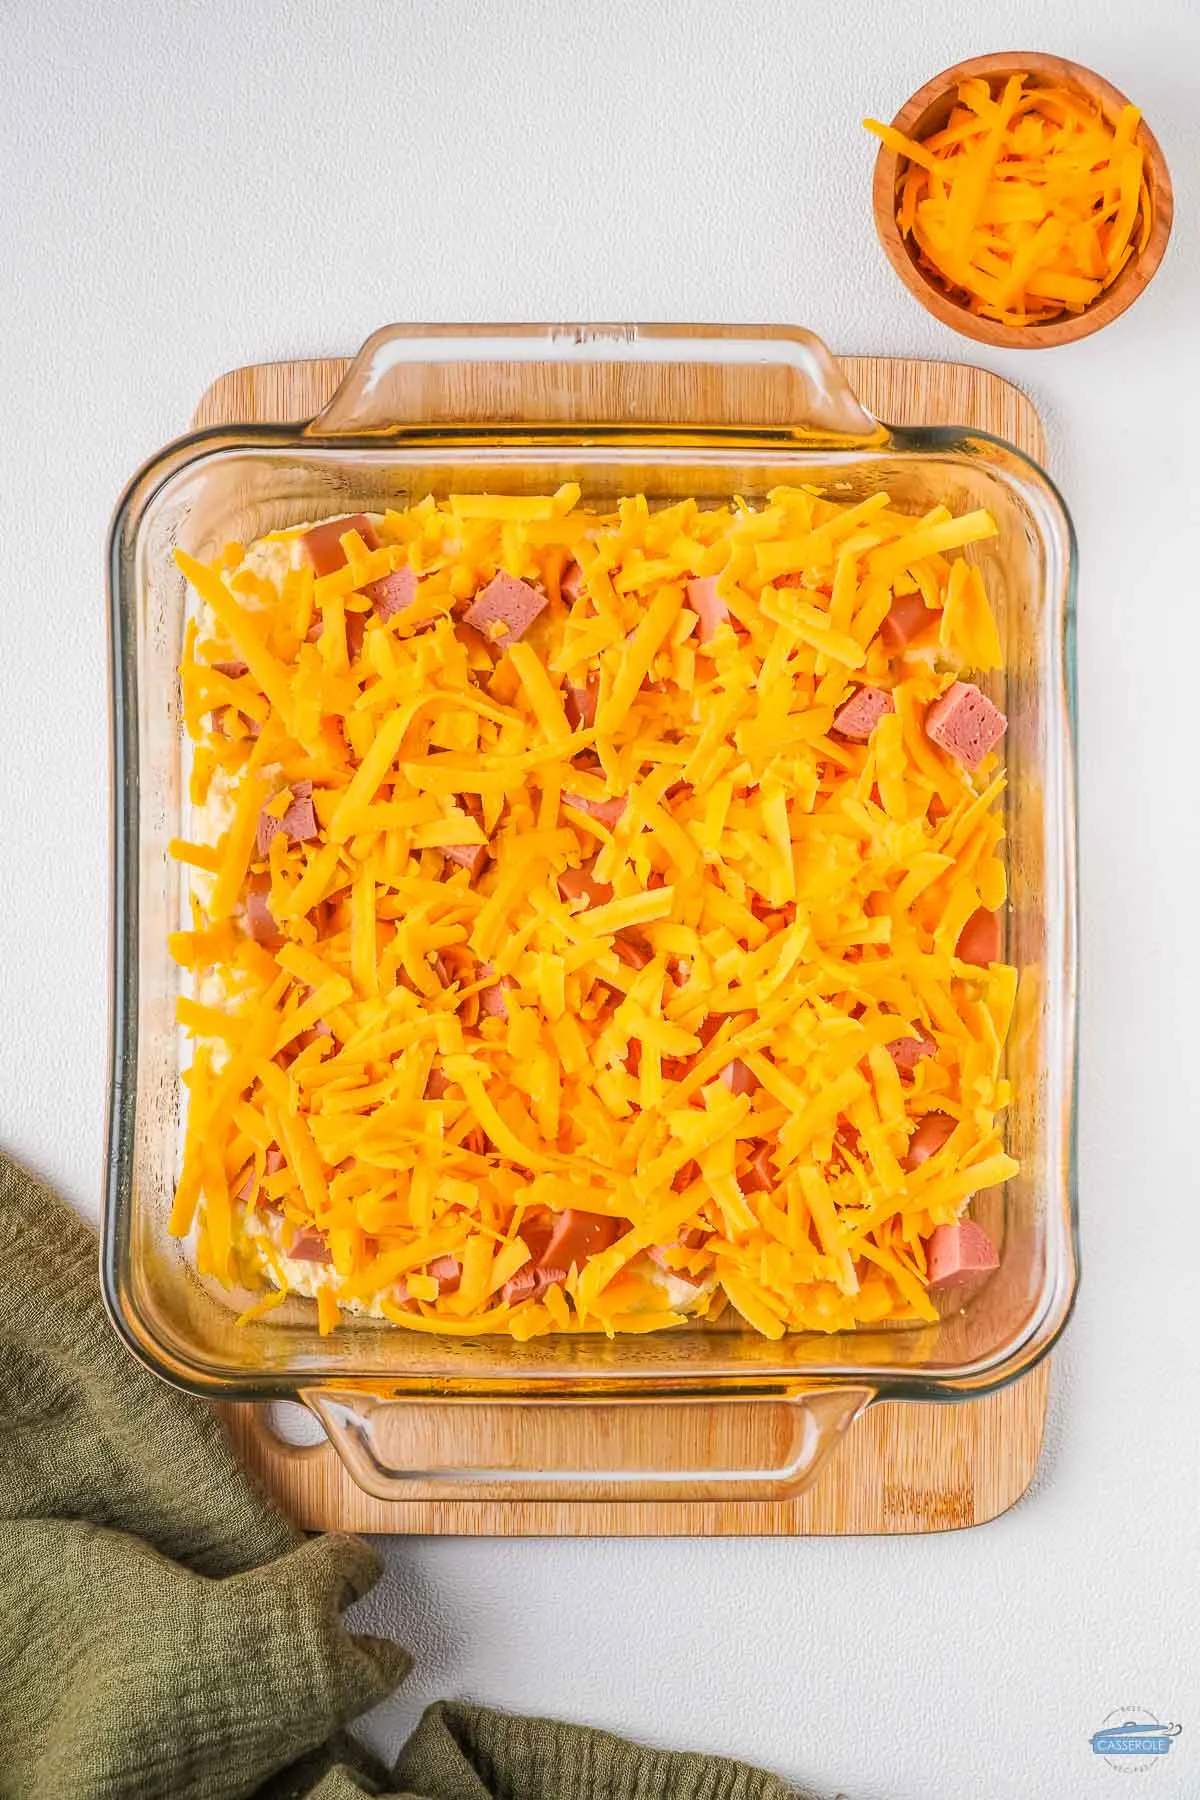

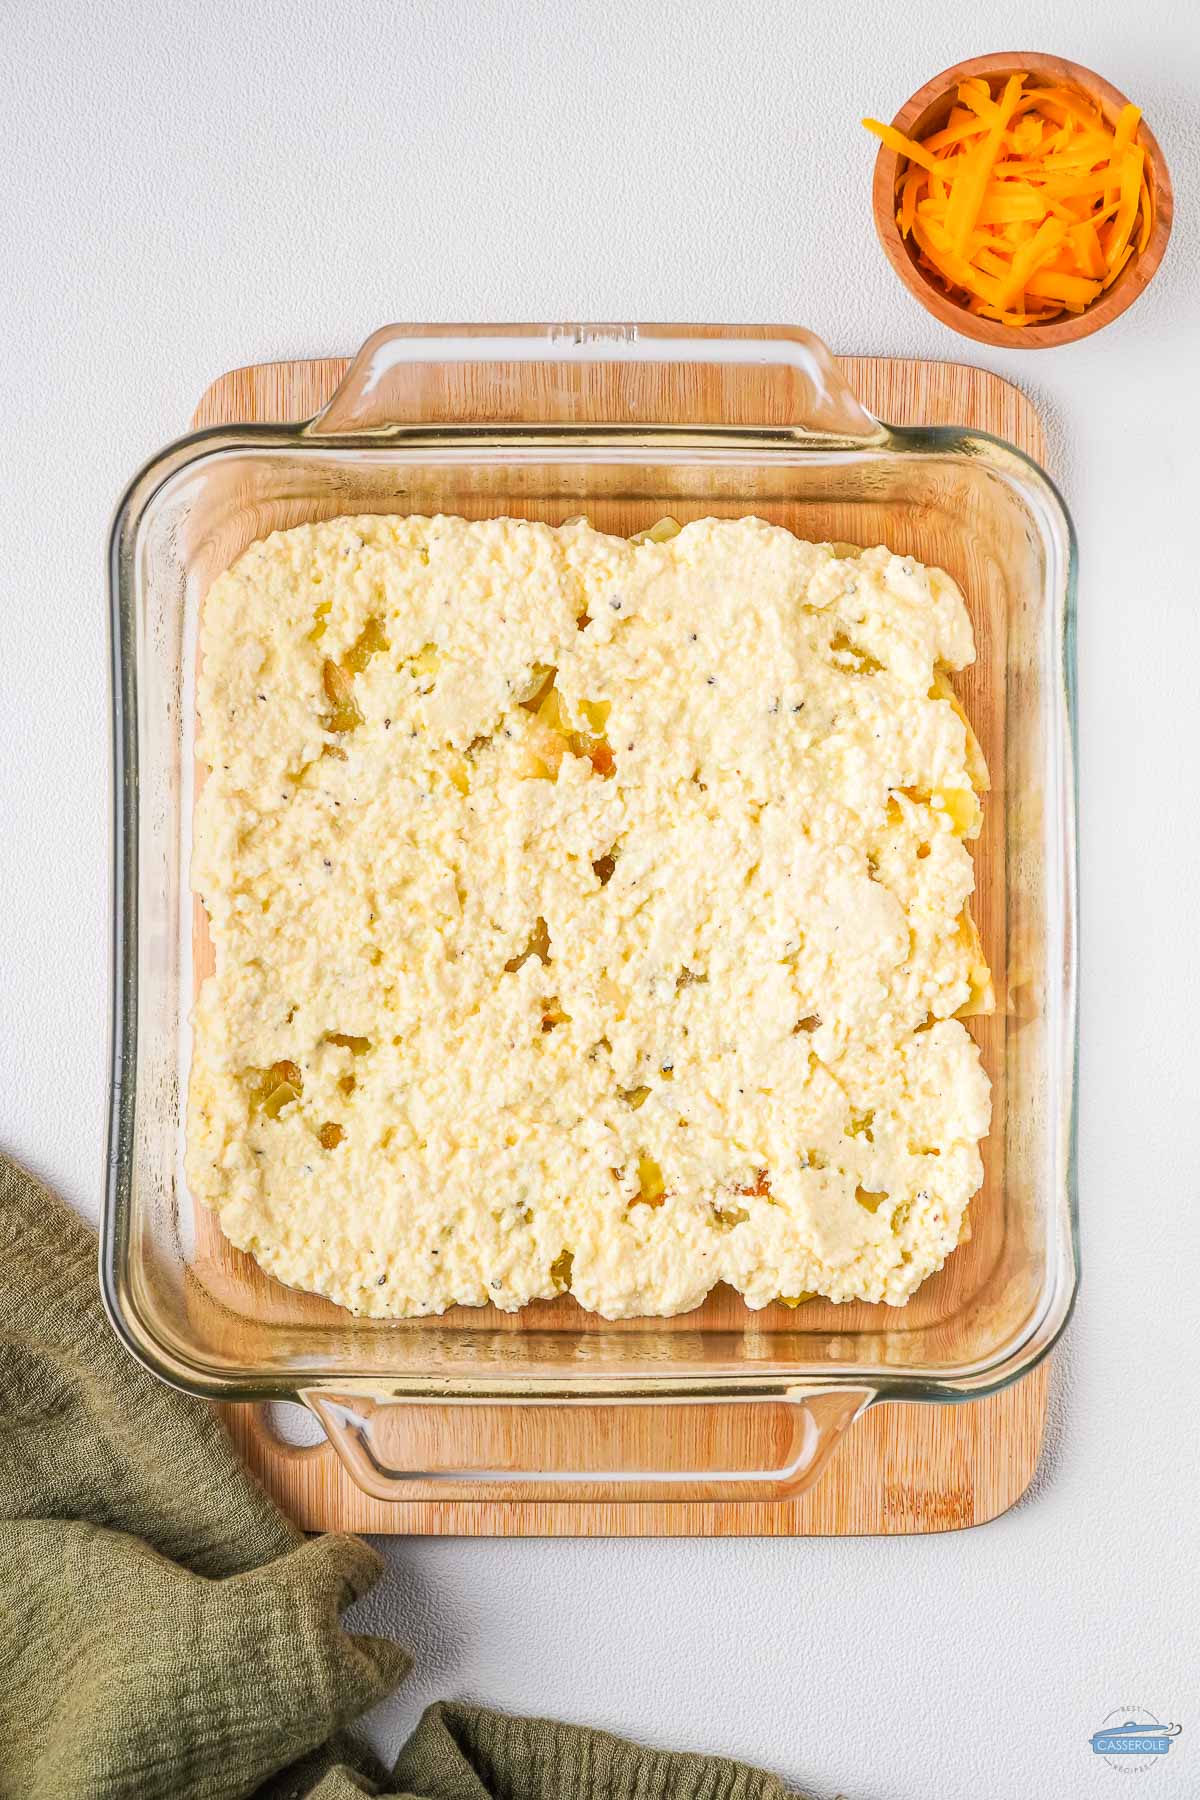
- To put casserole together, start by layering half of the pierogis on the bottom of the prepared dish. Add 1/3 of the ricotta mixture, 1/3 of the kielbasa, and 1/3 of the cheddar cheese. Repeat with the remaining pierogis and other ingredients, finishing with a layer of cheese on top.
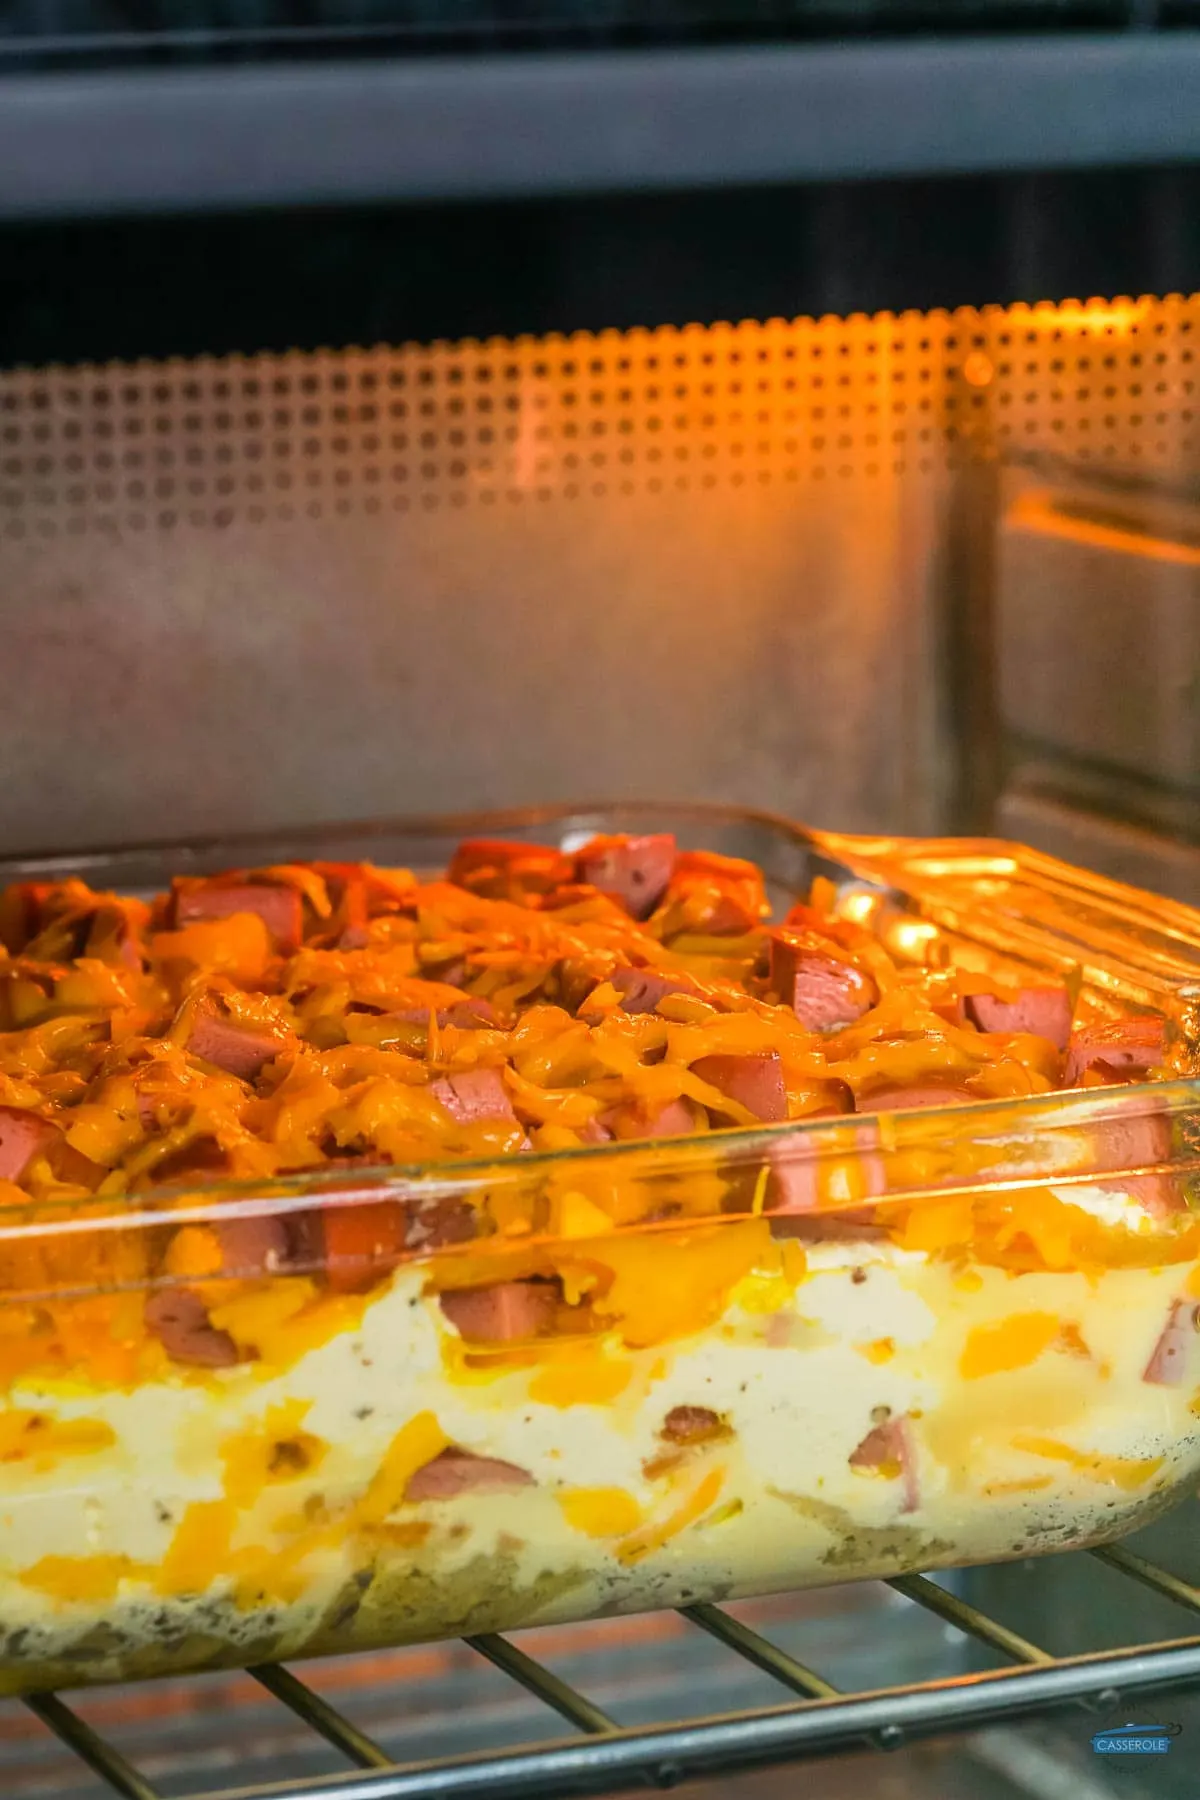
- Cover the casserole with foil and bake for 40 minutes. Remove the foil and bake for an additional 10 minutes until the cheese is golden brown and bubbly.
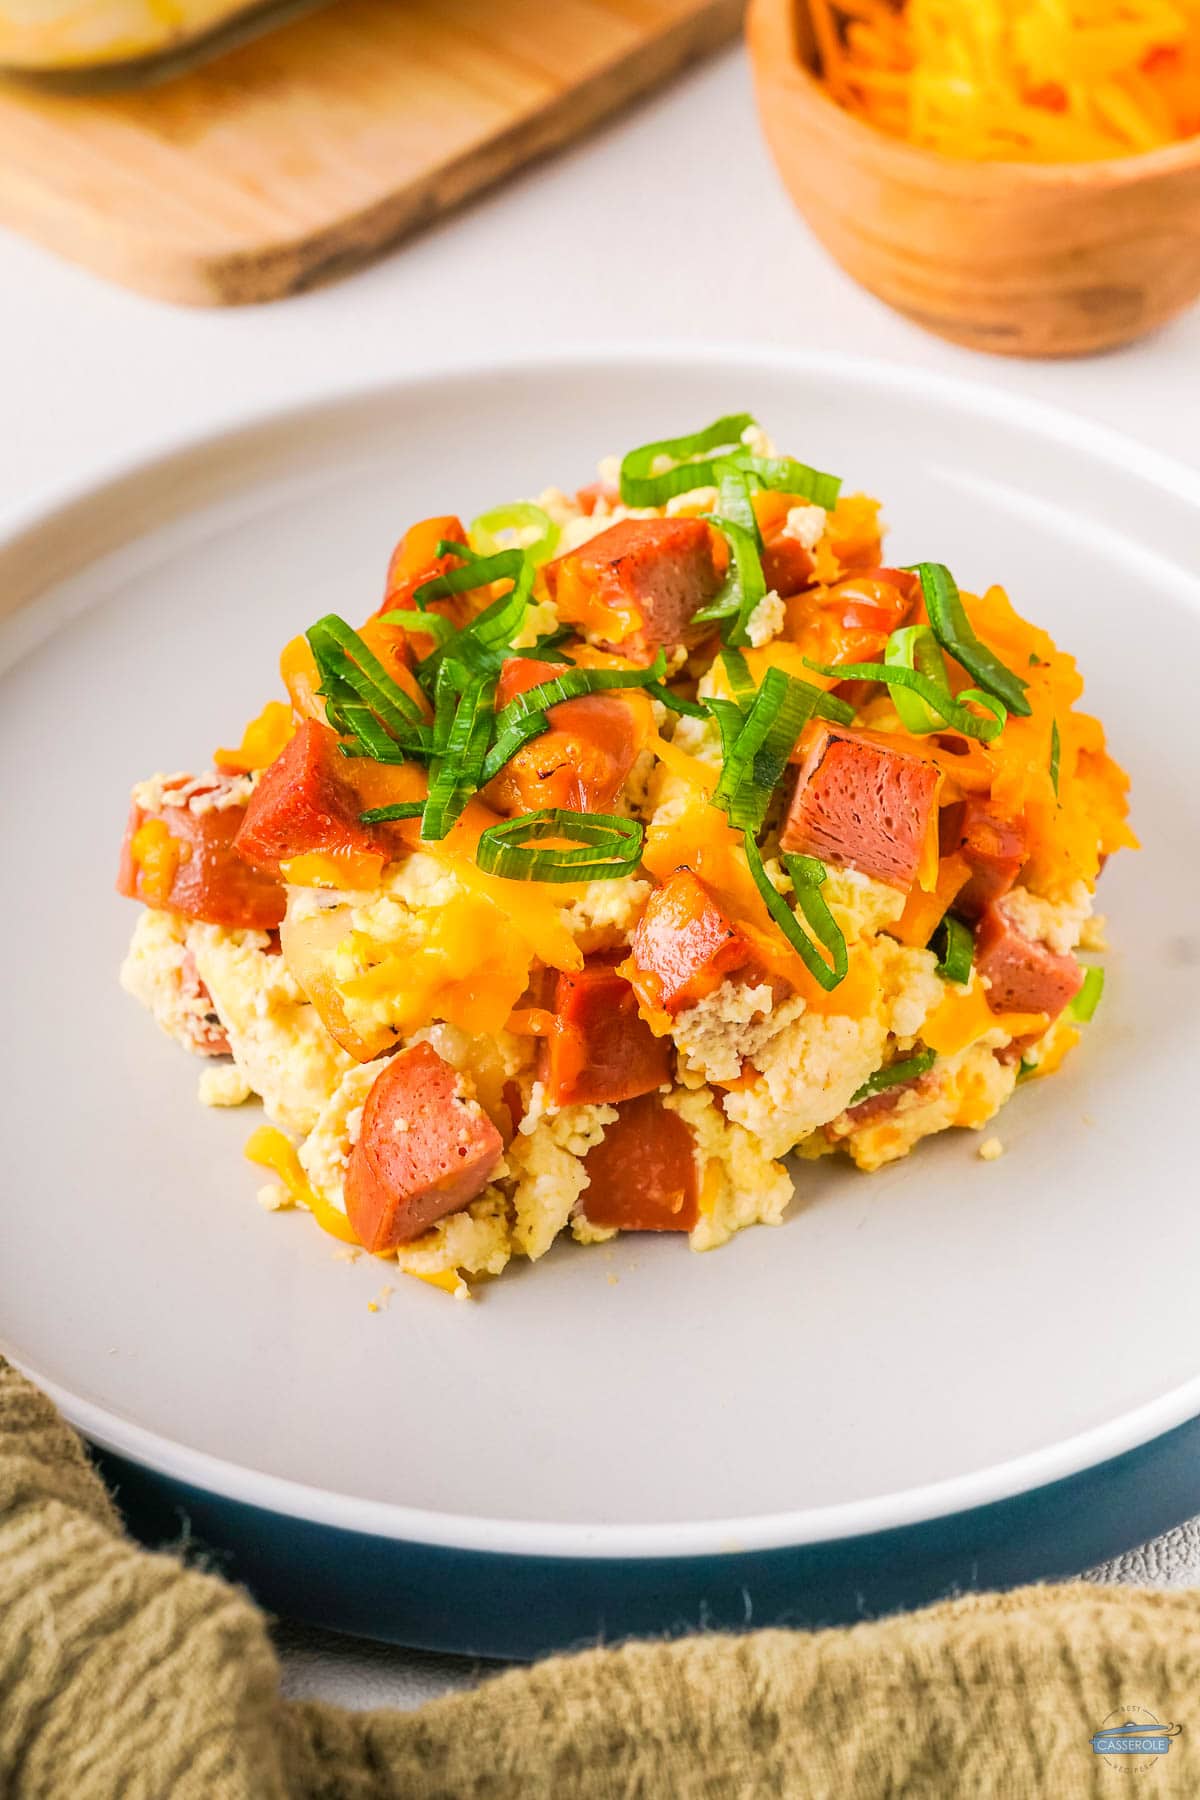
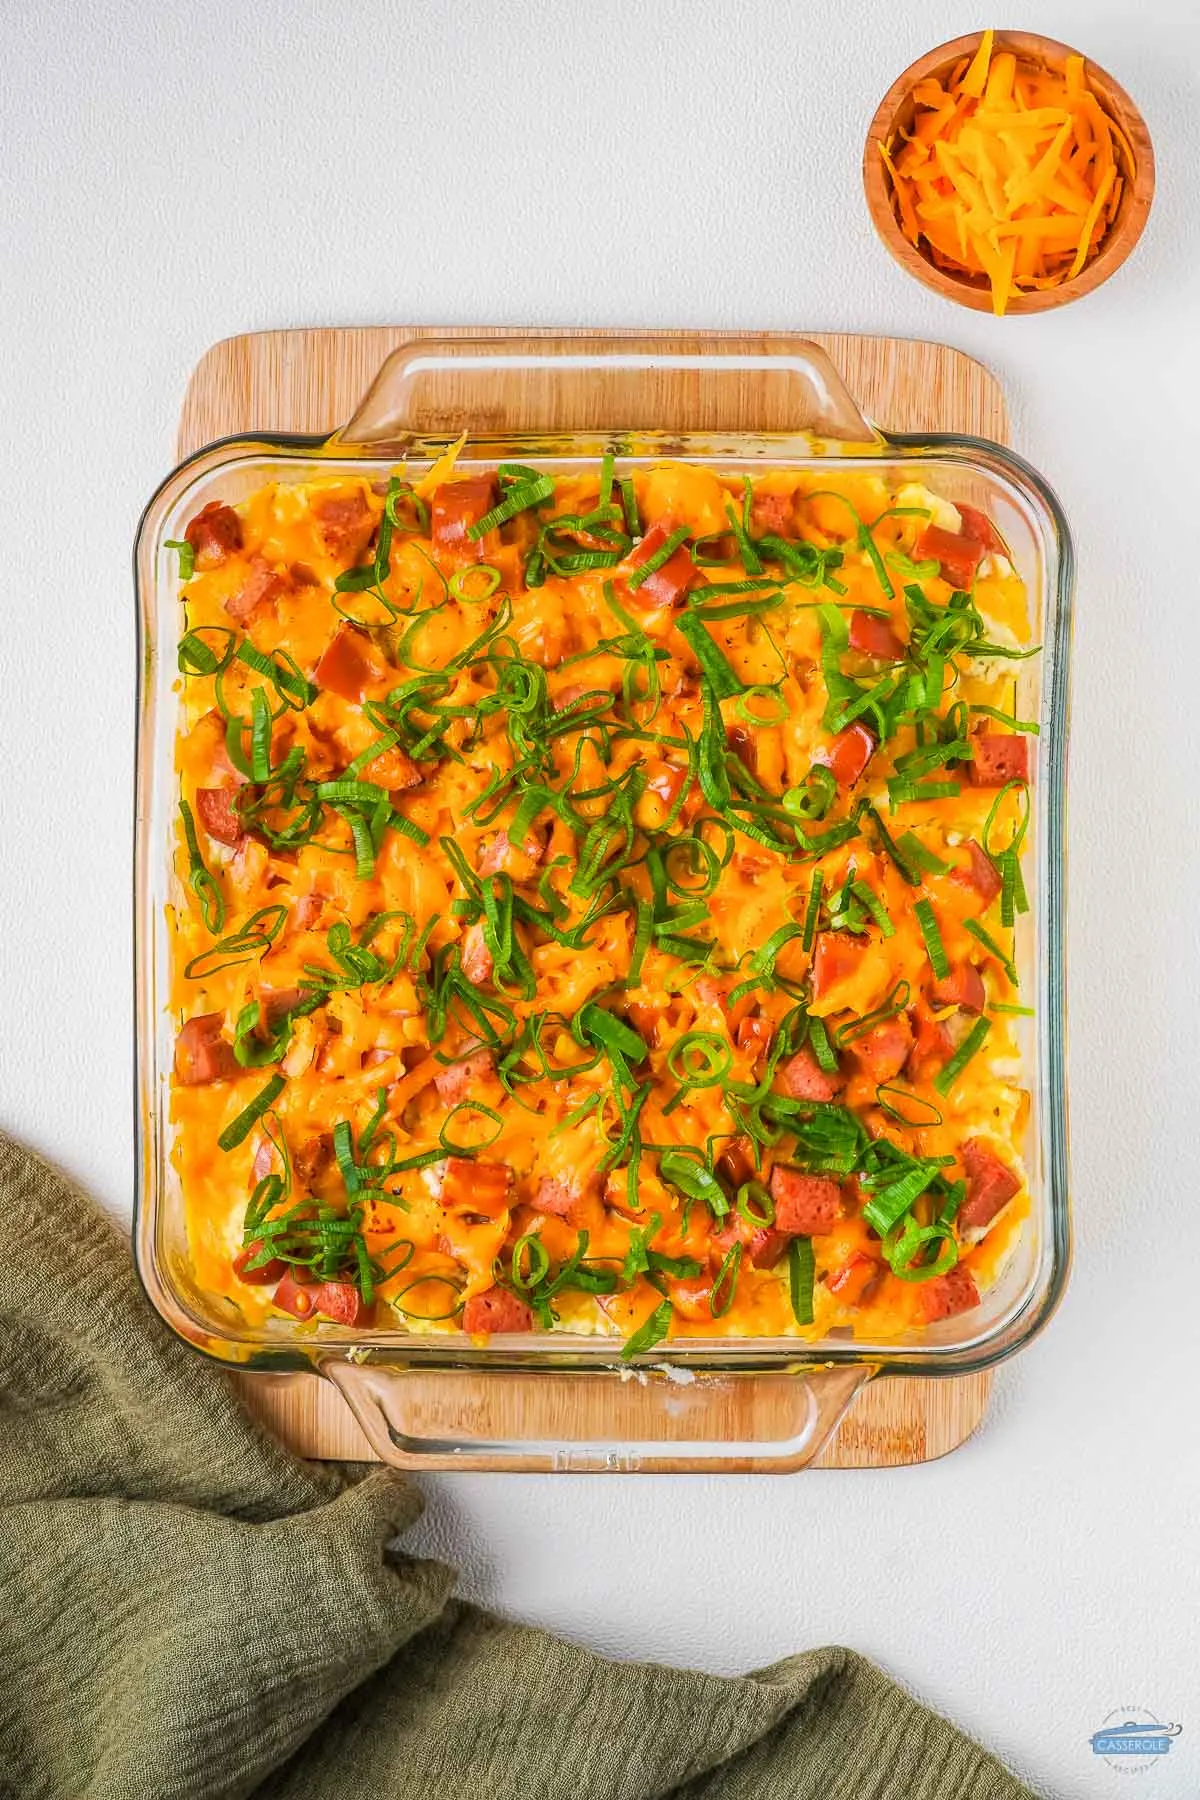
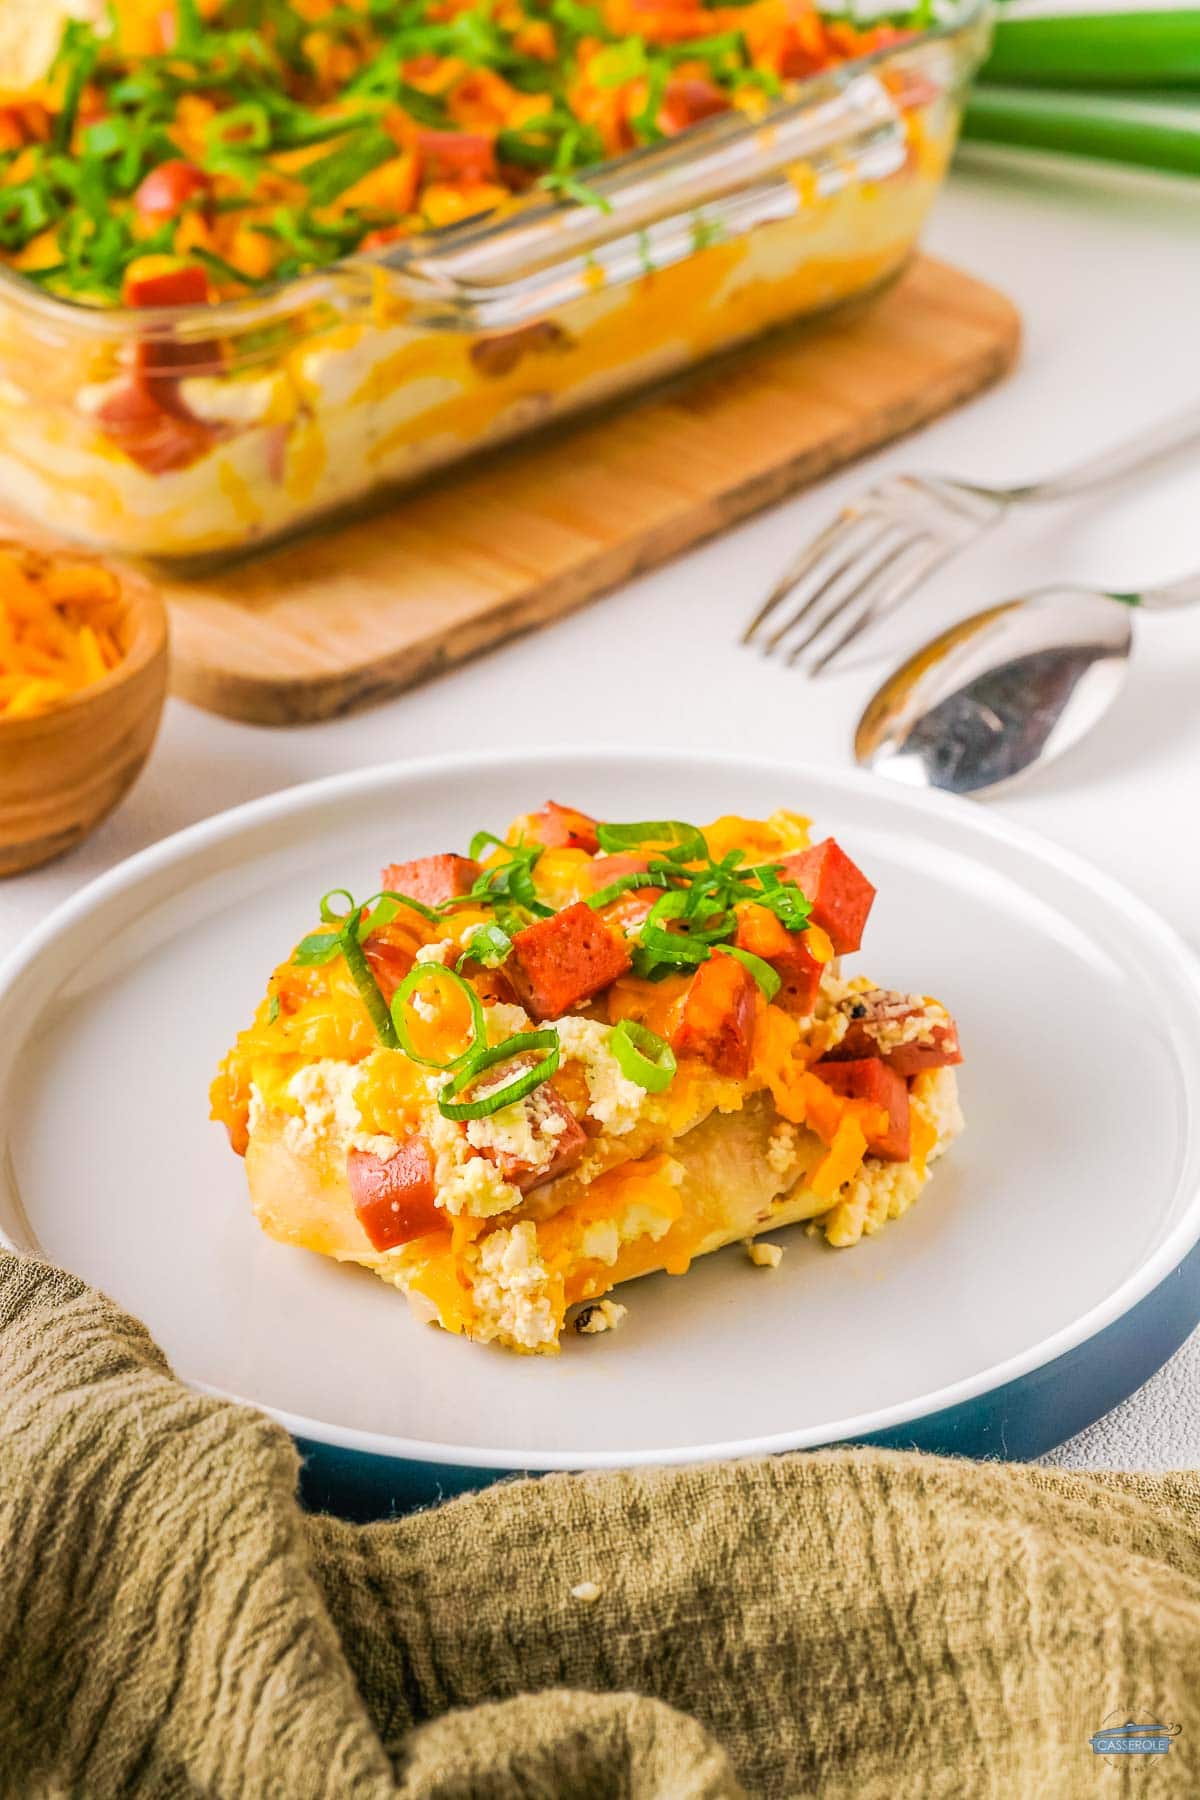
- Let the casserole cool slightly before topping with sliced green onions and serving. Enjoy!

Serving Suggestions
A fresh green salad and some crisp tender green beans are great with the creamy sauce!
How long does it last?
If stored properly, pierogi casserole can last up to 4 days if stored in an airtight container in the refrigerator.
Can I freeze it?
This pierogi casserole makes a great freezer meal. You can store it for up to 3 months. Let the casserole cool to room temperature.
Cover tightly with plastic wrap and then with aluminum foil and then freeze.
To reheat, thaw overnight in the refrigerator. Bake at 350F for 25-30 minutes or until the internal temperature reaches 165F.


Do I have to cook the frozen pierogi beforehand?
You don’t have to fully cook the frozen pierogi before making the pierogi casserole.
However, it is recommended to brown them in a pan over medium heat for a few minutes on each side before layering.
This step adds extra flavor and texture to the pierogi and helps to prevent them from becoming mushy in the casserole.

Tips for the Best Casserole
- Spray the casserole dish with nonstick spray for easy cleanup.
- For best results, thaw your frozen pierogi slightly before cooking them in your frying pan.
- Substitute the butter for olive oil.
- Leftover casserole will last in the fridge for 4-5 days. To store leftovers, cover tightly or place in an airtight container.
- Make a double batch of this yummy recipe and freeze one before baking.
If you love this recipe as much as I do, pin this to your favorite casserole Pinterest board and share it on your favorite social media channels!


This cheesy Pierogi Casserole is my favorite recipe for using frozen pierogi. I love to use the ones filled with a potato mixture with caramelized onions!


Pierogi Casserole Recipe
Equipment
Ingredients
- ½ cup butter
- 20 frozen classic onion pierogies
- 1 medium sweet onion diced small
- 16 ounces whole milk ricotta cheese
- 2 large eggs lightly beaten
- 1 teaspoon salt
- 1 teaspoon black pepper
- 12 ounces pork kielbasa diced medium size
- 2 cups sharp cheddar cheese shredded/divided (shred your own for better melting)
- 2 stalks green onions sliced
Instructions
- Preheat the oven to 350°F and spray a 9×9 baking dish with nonstick cooking spray.
- In a large skillet over medium heat, melt butter and brown the frozen pierogis and diced onions in two batches. Set aside to cool slightly.
- In a mixing bowl, combine the ricotta cheese, beaten eggs, salt, and pepper.
- To assemble the casserole, start by layering half of the pierogis on the bottom of the prepared dish.
- Add 1/3 of the ricotta mixture, 1/3 of the kielbasa, and 1/3 of the cheddar cheese. Repeat with the remaining pierogis and other ingredients, finishing with a layer of cheese on top.
- Cover the casserole with foil and bake for 40 minutes. Remove the foil and bake for an additional 10 minutes until the cheese is golden brown and bubbly.
- Let the casserole cool slightly before topping with sliced green onions and serving. Enjoy!
Notes
- Spray the casserole dish with nonstick spray for easy cleanup.
- For best results, thaw your frozen pierogi slightly before cooking them in your frying pan.
- Substitute the butter for olive oil.
- Leftover casserole will last in the fridge for 4-5 days. To store leftovers, cover tightly or place in an airtight container.
- Make a double batch of this yummy recipe and freeze one before baking.
Nutrition
BestCasseroleRecipes.com. Content and photographs are copyright protected. Sharing of this recipe is both encouraged and appreciated. Copying and/or pasting full recipes to any social media is strictly prohibited.